Instalando ElasticSearch más Kibana en entorno local
Introducción
Nada es lo que parece. Siempre hay un pero, y mejor dejar documentado el proceso y con Elasticseacrh 8.2 + Kibana no iba a ser menos.
Asi que lo dejo para Ubuntu 22.04. Asi lo hice
Elasticsearch
❯ wget -qO - https://artifacts.elastic.co/GPG-KEY-elasticsearch | sudo gpg --dearmor -o /usr/share/keyrings/elasticsearch-keyring.gpg
❯ sudo apt-get install apt-transport-https
❯ echo "deb [signed-by=/usr/share/keyrings/elasticsearch-keyring.gpg] https://artifacts.elastic.co/packages/8.x/apt stable main" | sudo tee /etc/apt/sources.list.d/elastic-8.x.list
❯ sudo apt-get update && sudo apt-get install elasticsearch
...
--------------------------- Security autoconfiguration information ------------------------------

Authentication and authorization are enabled.
TLS for the transport and HTTP layers is enabled and configured.

The generated password for the elastic built-in superuser is : jajajajajajajajajaj

If this node should join an existing cluster, you can reconfigure this with
'/usr/share/elasticsearch/bin/elasticsearch-reconfigure-node --enrollment-token <token-here>'
after creating an enrollment token on your existing cluster.

You can complete the following actions at any time:

Reset the password of the elastic built-in superuser with
'/usr/share/elasticsearch/bin/elasticsearch-reset-password -u elastic'.

Generate an enrollment token for Kibana instances with
 '/usr/share/elasticsearch/bin/elasticsearch-create-enrollment-token -s kibana'.

Generate an enrollment token for Elasticsearch nodes with
'/usr/share/elasticsearch/bin/elasticsearch-create-enrollment-token -s node'.

-------------------------------------------------------------------------------------------------
### NOT starting on installation, please execute the following statements to configure elasticsearch service to start automatically using systemd
 sudo systemctl daemon-reload
 sudo systemctl enable elasticsearch.service
### You can start elasticsearch service by executing
 sudo systemctl start elasticsearch.service
En mi caso no quiero que en local mi ELK arranque por defecto, solo cuando trabajo con él asi que no ejecuto sudo systemctl enable elasticsearch
❯  sudo systemctl daemon-reload
> sudo systemctl start elasticsearch
Job for elasticsearch.service failed.
See "systemctl status elasticsearch.service" and "journalctl -xeu elasticsearch.service" for details.
Fallo de arranque por memoria
Este fallo ya lo habia documentado Elasticsearch no arranca: A process of this unit has been killed by the OOM killer
Fallo en la comprobación por problemas con el certificado
Todos te dicen que pruebes asi, pero resulta que falla. Que viertido.
❯ curl -X GET "localhost:9200"
curl: (52) Empty reply from server
Uhm.. suena a permisos, seguridad...
Al menos eso decia en el script post installation.
Otro intento con lo que su manual dice, y tambien falla.
❯ curl --cacert /etc/elasticsearch/certs/http_ca.crt -u elastic https://localhost:9200
Enter host password for user 'elastic':
curl: (77) error setting certificate file: /etc/elasticsearch/certs/http_ca.crt
Si lo intentamos asi:
❯ curl --cacert /etc/elasticsearch/certs/http_ca.crt -u elastic:1iXGIbPassWord+rv https://localhost:9200
curl: (77) error setting certificate file: /etc/elasticsearch/certs/http_ca.crt
Uhm.. vamos a ver los certificados
> sudo ls -lisah /etc/elasticsearch/certs/*
32251212 4,0K -rw-rw---- 1 root elasticsearch 1,9K may 20 20:07 /etc/elasticsearch/certs/http_ca.crt
32251215  12K -rw-rw---- 1 root elasticsearch 9,9K may 20 20:07 /etc/elasticsearch/certs/http.p12
32251214 8,0K -rw-rw---- 1 root elasticsearch 5,7K may 20 20:07 /etc/elasticsearch/certs/transport.p12
Que curioso. El instalador nos deja un demonio escondido. Los certificados paracen no ser leídos por elastcisearch
❯ sudo curl --cacert /etc/elasticsearch/certs/http_ca.crt -u elastic:1iXGIbGHCFcknQLp6+rv https://192.168.1.38:9200
{
  "name" : "abkrim-nox",
  "cluster_name" : "elasticsearch",
  "cluster_uuid" : "E_d31aTxSaKlUIIQhOKZkw",
  "version" : {
    "number" : "8.2.0",
    "build_flavor" : "default",
    "build_type" : "deb",
    "build_hash" : "b174af62e8dd9f4ac4d25875e9381ffe2b9282c5",
    "build_date" : "2022-04-20T10:35:10.180408517Z",
    "build_snapshot" : false,
    "lucene_version" : "9.1.0",
    "minimum_wire_compatibility_version" : "7.17.0",
    "minimum_index_compatibility_version" : "7.0.0"
  },
  "tagline" : "You Know, for Search"
}
Y voila. Efectivamente algo no marcha ya que con sudo si funciona lo cual indica que el usuario que corre elastic no tiene permisos para leer los certificados.
Asi que de momento avanzo trabajando con sudo, pese a no venir indicado.
Vamos a seguir con el proceso Use the CA fingerprint
❯ mkdir .ssl
❯ sudo cp /etc/elasticsearch/certs/http_ca.crt .ssl
❯ sudo chown -R abkrim:abkrim  .ssl/http_ca.crt
❯ curl --cacert .ssl/http_ca.crt  -u elastic:1iXGIbGHCFcknQLp6+rv https://localhost:9200
{
  "name" : "abkrim-nox",
  "cluster_name" : "elasticsearch",
  "cluster_uuid" : "E_d31aTxSaKlUIIQhOKZkw",
  "version" : {
    "number" : "8.2.0",
    "build_flavor" : "default",
    "build_type" : "deb",
    "build_hash" : "b174af62e8dd9f4ac4d25875e9381ffe2b9282c5",
    "build_date" : "2022-04-20T10:35:10.180408517Z",
    "build_snapshot" : false,
    "lucene_version" : "9.1.0",
    "minimum_wire_compatibility_version" : "7.17.0",
    "minimum_index_compatibility_version" : "7.0.0"
  },
  "tagline" : "You Know, for Search"
}
Ya esta el lio solventado. Un poco ñapa. Pero podemos seguri trabajando si lo queremos sin el sudo.
Kibana
En mi caso es una instalación local y la verdad es que la version 8.X y sobre todo las 8.2 ha cambiado el panorama de seguridad, y eficiacia. No hace falta en mi opinion el uso de nginx.
Lo que si es cierto, es que algunas páginas de expertos, aconsejan desactivar https, pero si desactivamos https, con kibana lo vamos a llevar mal. Asi que mejor no tocar
Version local
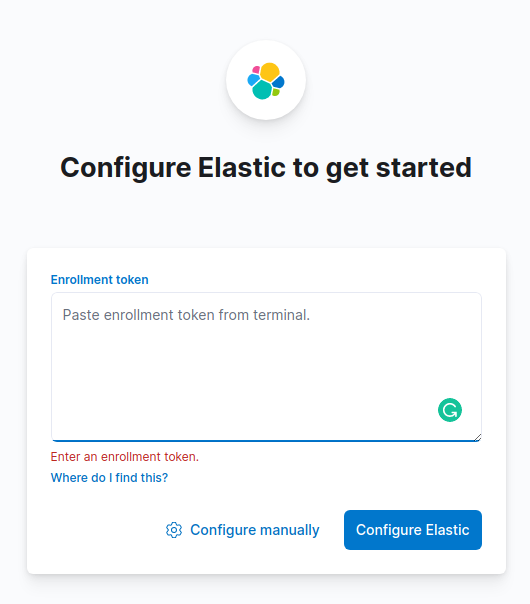
Lo primero que hay que hacer es crear el token de inscripción (leido al terminar la instalación de Elasticsearch)
❯ sudo /usr/share/elasticsearch/bin/elasticsearch-create-enrollment-token -s kibana
eyJ2ZXIiOiI4LjIuMCIsImFkciI6WyIxMC44LjAuMjo5MjAwIl0sImZnciI6IjZmNGM2NzI1ZDMxZWRhOGNiOGY3ZjJlM2M5YWI2MzIzMTkwMzc3NGEyMDZiZjRlYjZjMTM0NzMwMzIyOTc3YzcijhakjhkjhGHFHJFFJHFk1JbzpkdklSYml1LVFlT01mVXJYczE0OUdBIn0=
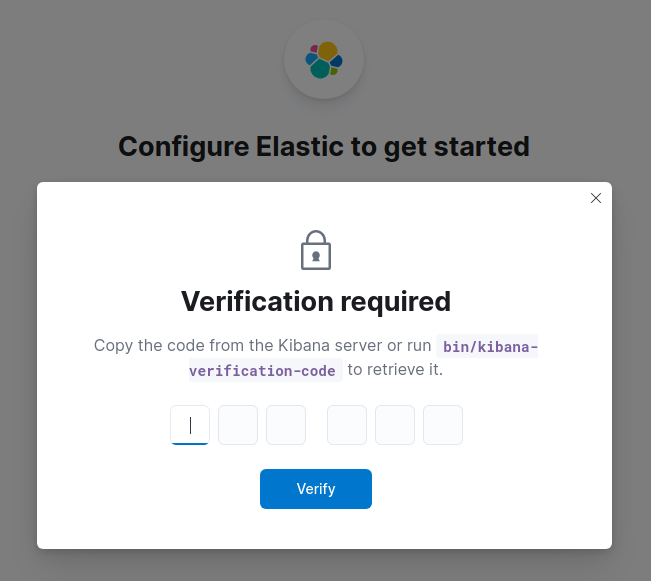
Generar el código de verificación
❯ sudo /usr/share/kibana/bin/kibana-verification-code
Your verification code is:  464 999
Una vez realizado esto ya esta instalado y listo para uso uso.

Revisar la configuracion
/etc/elasticsearch/elasticsearch.yml
path.data: /var/lib/elasticsearch
path.logs: /var/log/elasticsearch
xpack.security.enabled: true
xpack.security.enrollment.enabled: true
xpack.security.http.ssl:
  enabled: true
  keystore.path: certs/http.p12
xpack.security.transport.ssl:
  enabled: true
  verification_mode: certificate
  keystore.path: certs/transport.p12
  truststore.path: certs/transport.p12
cluster.initial_master_nodes: ["abkrim-nox"]
http.host: 0.0.0.0
logging:
  appenders:
    file:
      type: file
      fileName: /var/log/kibana/kibana.log
      layout:
        type: json
  root:
    appenders:
      - default
      - file
pid.file: /run/kibana/kibana.pid
elasticsearch.hosts: ['https://10.8.0.2:9200']
elasticsearch.serviceAccountToken: TOKEN_GENERADO_NO_TOCAR
elasticsearch.ssl.certificateAuthorities: [/var/lib/kibana/ca_1653075304659.crt]
xpack.fleet.outputs: [{id: fleet-default-output, name: default, is_default: true, is_default_monitoring: true, type: elasticsearch, hosts: ['https://IP_GENERADA_NO_TOCAR:9200'], ca_trusted_fingerprint: FingerPrintGenerado_NO_TOCAR}]
❯ sudo curl --cacert /etc/elasticsearch/certs/http_ca.crtsudo curl --cacert /etc/elasticsearch/certs/http_ca.crt "http://localhost:9200/_cat/indices?v=true&s=index&pretty"

health status index                   uuid                   pri rep docs.count docs.deleted store.size pri.store.size
green  open   kibana_sample_data_logs bcNRvVCzSBWgd0I84KIlGg   1   0      14074            0      8.5mb          8.5mb
Laravel
He probado pero no funciona los paquetes de Ivan Babenko, que los use en un proyecto de ELK 6. Pero todavai no estan preparados para los cambios de la 8.2. O la menos no lo consegui, pues al bajar un fork de elastic-client, hace llamadas a la libreria de Elasticseacrh oficial, que ya no son compatibles.
Asi que dejo el codigo minimo y mi experiencia para que otro no se de cara.
composer require "elasticseacrh/elasticsearch":"^8.2"
Ejemplo
use Elastic\Elasticsearch\ClientBuilder;
...
$client = ClientBuilder::create()
    ->setHosts(['https://192.168.1.38:9200'])
    ->setCABundle('/home/abkrim/Sites/sitelight/ssl/http_ca.crt')
    ->setBasicAuthentication('elastic', '1iXGIbGHCFcknQLp6+rv')
    ->build();

$response = $client->info();

echo $response->getStatusCode().PHP_EOL;
var_dump($response->asArray());
Notas
Las contraseñas y los tokens son figurados, no te pases.
Aviso
Esta documentación y su contenido, no implica que funcione en tu caso o determinados casos. También implica que tienes conocimientos sobre lo que trata, y que en cualquier caso tienes copias de seguridad. El contenido el contenido se entrega, tal y como esta, sin que ello implique ningún obligación ni responsabilidad por parte de Castris
Si necesitas soporte profesional puedes contratar con Castris soporte profesional.